How to Dry Trail Running Shoes
Getting your trail running shoes dry is a common challenge, especially if you run in varied conditions. Proper drying methods are crucial to avoid damaging your shoes, preventing odor, and ensuring they’re ready for your next adventure. This guide walks you through exactly how to dry trail running shoes effectively.
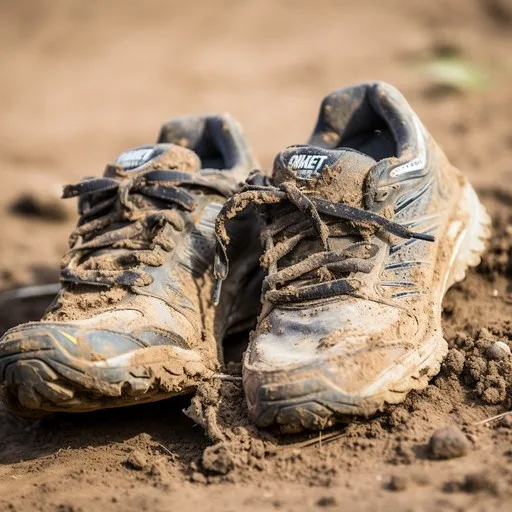
Image source: Bing (Web (fair-use with source credit))
Manufacturer specifications often highlight that synthetic materials used in modern trail running shoes can degrade significantly with excessive heat. This means incorrect drying can shorten your shoe's lifespan considerably. We’ll break down the best ways to handle wet footwear, from slightly damp to completely soaked.
Assess Your Soaked Trail Shoes
The first step in drying your trail running shoes correctly is understanding just how wet they are. This dictates the gentlest and most effective approach.
Damp, Moderately Wet, or Soaked?

Image source: Web (Bing) / macobserver.com (Web image (fair-use with source credit))
Your assessment of the moisture level helps determine the drying timeline and the methods you should use. This isn't just about comfort; it's about preserving the integrity of the shoe's materials.
- Damp Shoes: These feel slightly moist to the touch, perhaps after a run on wet grass or in light drizzle. They usually don’t feel heavy.
- Moderately Wet Shoes: These have been through puddles or light stream crossings. They will feel noticeably heavier and might drip a little.
- Soaked Shoes: These are saturated through, typically from deep water crossings, heavy rain, or extensive mud. They will be very heavy and drip significantly.
Understanding these levels helps you choose the right tools and patience for the job. Over-drying or using the wrong method can cause materials to warp or glue to fail.
The No-Heat Rule: Your Shoe Drying Non-Negotiable
The most critical piece of advice for drying any footwear, especially performance shoes like trail runners, is to never use direct heat. This is a rule manufacturers and shoe care experts consistently emphasize. High temperatures from radiators, fireplaces, ovens, or even prolonged direct sunlight can severely damage the glues and synthetic fabrics that make up your shoes.
According to testing standards from organizations like the American Society for Testing and Materials (ASTM), synthetic polymers and adhesives commonly found in footwear can begin to break down or lose their bonding strength at temperatures exceeding approximately 50-60°C (122-140°F). This means a hot car dashboard or direct sun on a summer day can be just as damaging as a space heater. Such damage often leads to delamination of the sole, separation of the upper from the midsole, and a general loss of structural integrity.
Gentle Drying Methods for Slightly Damp Shoes
If your trail running shoes are just a bit damp, you're in luck. These methods are simple, quick, and keep your shoes in great shape. The goal here is to encourage natural evaporation without stressing the materials.
Air Drying Effectively
This is the most basic and often the best method for lightly damp shoes. It relies on ambient air circulation to remove moisture.
- Preparation: Loosen the laces all the way down. Pull the tongue of the shoe forward and outward as much as possible. This opens up the internal space, allowing air to reach all surfaces.
- Placement: Find a spot with good airflow. This could be near an open window, a ceiling fan (on a low setting, not blowing directly), or in a well-ventilated room. Avoid enclosed spaces like closets or gym bags, as they trap moisture.
- Time: Depending on humidity and airflow, damp shoes can dry completely in a few hours to overnight.
This method is ideal because it’s completely passive and imposes zero stress on the shoe's construction. It's what you should aim for if your shoes aren't heavily saturated.
Stuffing for Moisture Absorption
For shoes that are a little more than just damp, or if you want to speed up the drying process a bit, absorbent stuffing is your best friend. This technique supplements air drying by actively pulling moisture out from the inside.
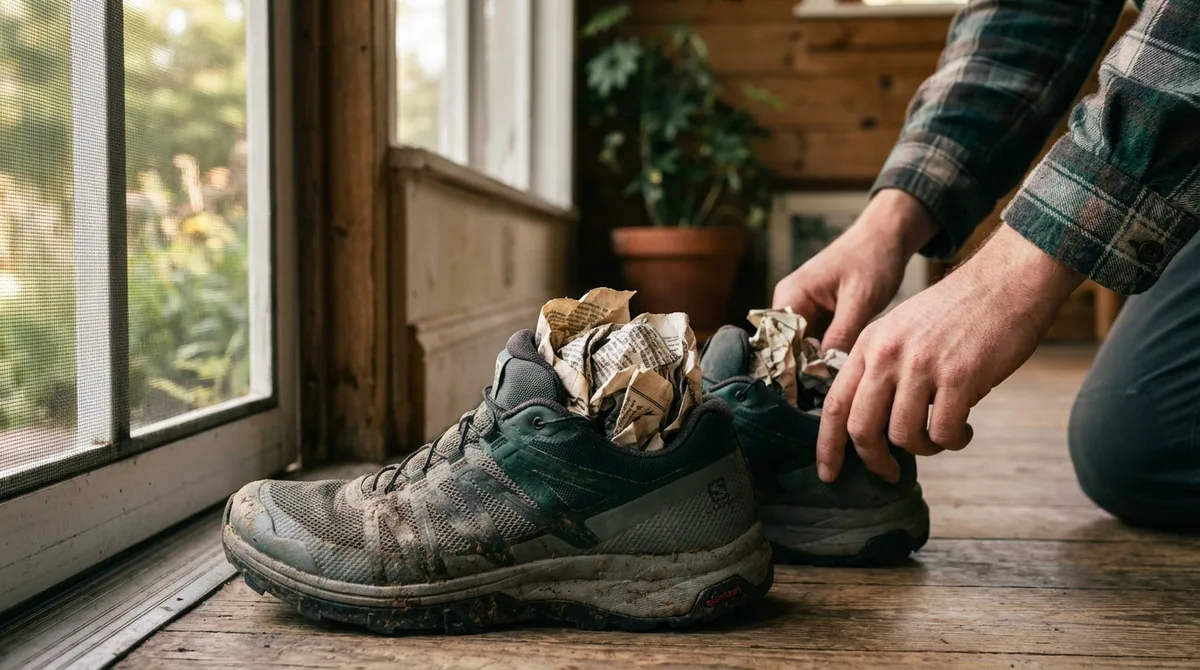
Image source: Bing (Web (fair-use with source credit))
- Materials: The most common stuffing materials are newspaper and paper towels. For best results, crumple them loosely, tightly packed material won't absorb as effectively. Plain newsprint is generally safe, but be aware that some inks can transfer, especially if they get very wet. Plain paper towels or even old cotton t-shirt scraps are excellent alternatives.
- Technique: Pack the absorbent material loosely into the toe box and up into the shoe cavity. You don't want to force it, as that can distort the shoe's shape. The material should feel comfortably full.
- Maintenance: Check the stuffing every few hours. If it feels damp or heavy, remove it and replace it with fresh, dry material. This is especially important for moderately wet shoes.
- Combined Approach: Always pair stuffing with good airflow. Place the stuffed shoes in a well-ventilated area, just like you would for plain air drying.
This method is highly effective for drawing out moisture that air alone might struggle to reach quickly. It’s a practical way to manage residual dampness without resorting to heat.
Tackling Moderately Wet Trail Runners
When your trail running shoes have been submerged in puddles or splashed through muddy sections, they need a more robust drying strategy than just simple air drying. The goal here is to efficiently remove significant moisture while still protecting the shoe's materials.
Combining Airflow and Absorption
For moderately wet shoes, a combination of good airflow and effective moisture absorption is the most efficient approach. You'll essentially be using the methods for damp shoes, but with more intensity and frequency.
- Initial Shake & Loosen: Start by vigorously shaking any excess water from the shoes. Then, loosen all the laces and pull the tongue forward to create maximum internal space. This allows the drying agents to work better.
- Stuff Them Well: Pack the inside of the shoes with your chosen absorbent material, newspaper, paper towels, or old cloth scraps. Don't be shy; fill them until they feel snug but not overstuffed.
- Ventilated Location: Place the shoes in a well-ventilated area, away from any heat sources. A spot with a gentle breeze or near a fan is ideal.
- Frequent Stuffing Changes: This is key for moderately wet shoes. Check the stuffing every 1-2 hours. As soon as it feels damp, remove it and replace it with fresh, dry material. You'll likely go through several batches of stuffing over the first day.
This combined method actively removes moisture from the shoe's core and allows fresh, dry air to circulate, significantly speeding up the drying process.
When to Use a Gentle Fan
Using a fan can be a game-changer for drying moderately wet trail running shoes, provided it's done correctly. It significantly enhances the evaporation rate by continuously moving air over and around the shoes.
- Setup: Place your shoes a comfortable distance (about 2-3 feet) in front of a standard oscillating or stationary fan. Set the fan to a medium speed. Avoid placing them so close that the direct airflow feels harsh or potentially distorts the shoe's shape.
- Purpose: The fan's constant airflow helps to whisk away the moist air that builds up around the shoe, replacing it with drier ambient air. This process, known as forced convection, is much faster than relying on natural air currents alone.
- Integration: This works best when combined with stuffing. The stuffing pulls moisture from the shoe's interior, and the fan helps evaporate that moisture from the stuffing and the shoe's exterior.
- Crucial Reminder: As with all drying methods, ensure the fan is not blowing hot air. Most household fans are designed to blow room-temperature air, which is exactly what you need. Avoid any fan that has a heating element.
Manufacturer guidelines, such as those found in product care manuals from leading outdoor footwear brands, consistently advise against the use of any appliance that generates heat, reinforcing the importance of cool, circulating air.
Drying Soaked Trail Shoes: The Patient Approach
When your trail running shoes are completely saturated, it’s essential to be patient and methodical. Rushing the process or using incorrect methods can lead to irreversible damage. This approach focuses on safely extracting maximum moisture.
Step 1: Initial Drainage and Loosening
First, get as much water out as you physically can. Turn the shoes upside down and shake them vigorously. If there's significant mud, you might want to give them a quick rinse with cool water before shaking.
Then, loosen all the laces completely. Pull the tongue forward and outward as much as the shoe structure allows. This creates wide-open channels for air to enter and moisture to escape.
Step 2: The Power of Absorbent Stuffing
This is where you’ll rely heavily on absorbent materials to draw out the deep-seated moisture. Newspaper is a common choice, but plain paper towels or old cotton t-shirts are also excellent.
- Stuffing: Loosely pack the insides of each shoe. Aim to fill the entire cavity, from the toe box to the heel. Avoid compressing the material too tightly, as this can impede airflow and absorption.
- Replacement Schedule: For completely soaked shoes, you'll need to replace the stuffing frequently. Check it every hour for the first 3-4 hours, and then every 2-3 hours afterward. As the stuffing becomes damp, remove it and replace it with dry material. This constant exchange is crucial for effective drying.
Step 3: Consistent Air Circulation
Air circulation is your best friend when dealing with heavily soaked shoes. Combine this with stuffing for the most effective results.
- Fan Use: Position the shoes a few feet in front of a fan set to a medium, oscillating speed. This ensures continuous airflow around the shoes without blasting them directly.
- Environment: Ensure the room has good ventilation, but avoid any direct heat sources like radiators or open windows that let in direct, hot sunlight. Cool, consistent airflow is the goal.
- Timeline: Drying completely soaked shoes can take anywhere from 24 to 72 hours, depending on humidity and how saturated they were. Don't rush this process.
Trail Shoe Drying Mistakes to Absolutely Avoid
Understanding what not to do is as critical as knowing the proper drying techniques. A few common mistakes can easily ruin your trail running shoes, making them unusable.
Why Direct Heat is the Enemy
The number one mistake is exposing wet shoes to direct heat. This includes placing them on or near radiators, in front of a fireplace, in a clothes dryer (even on a no-heat setting), or in direct, hot sunlight for extended periods.
Research from material science indicates that extreme heat can rapidly degrade the adhesives used in shoe construction. These adhesives are often the weakest link, and heat causes them to soften, break down, or even melt. This leads to the sole separating from the upper, seams splitting, and the overall structure of the shoe becoming compromised.
Many synthetic materials used in shoe uppers and midsoles can also shrink, warp, or become brittle when exposed to high temperatures.
Other Common Errors
Beyond direct heat, other actions can harm your shoes during the drying process.
- Wringing Out: Never wring your shoes out as if they were a towel. This can twist and tear internal structures and weaken the fabric.
- Sealed Containers: Avoid storing wet shoes in plastic bags or sealed containers. This traps moisture, creating a humid environment that promotes mold and mildew growth, leading to unpleasant odors and material decay.
- Aggressive Cleaning (Too Soon): While mud needs rinsing, avoid deep cleaning with harsh chemicals or vigorous scrubbing on very wet shoes, as this can further damage weakened materials.
Your Trail Shoe Drying Decision Guide
To make the best choice for your wet trail running shoes, consider this decision-making framework. It helps you quickly identify the most appropriate drying method based on their condition.
Quick Decision Flowchart
Are the shoes slightly damp from a light run?
- Yes: Proceed to Gentle Drying Methods. Prioritize air drying, supplemented with loose stuffing if needed.
- No: Move to the next question.
Are the shoes noticeably wet, dripping, or heavy from puddles/streams?
- Yes: Proceed to Tackling Moderately Wet Trail Runners. Combine stuffing with a gentle fan and frequent changes of absorbent material.
- No: Move to the next question.
Are the shoes completely saturated, heavy, and dripping profusely from submersion?
- Yes: Proceed to Drying Soaked Trail Shoes. Focus on thorough drainage, extensive stuffing, and consistent, cool airflow. Be prepared for a multi-day drying process.
- No: Re-evaluate the wetness level.
When to Seek Professional Help (or New Shoes)
Sometimes, despite best efforts, shoes might be beyond effective drying or repair. If your shoes have been soaked for an extended period (over 48 hours) without proper drying, or if they show signs of significant material degradation (like sole separation or cracking), it might be time to consider replacement.
Official shoe care guides from manufacturers often recommend replacing footwear if structural damage is evident, as compromised materials can lead to poor performance and increased risk of injury.
Keeping Your Trail Shoes Fresh and Dry Long-Term
Proper drying after each wet run is part of a larger maintenance routine that keeps your trail running shoes in top condition for longer. This proactive care prevents common issues like odor and material breakdown.
Basic Maintenance for Dryness
The key to long-term shoe dryness is immediate attention after a run. As soon as you take them off, perform the initial steps: loosen laces, pull out the tongue, and shake out excess water and debris. If they are damp, start the air-drying or stuffing process immediately.
If you consistently run in wet conditions, consider having two pairs of trail running shoes to rotate. This allows one pair to dry out completely between uses, preventing them from staying damp for too long. This rotation strategy is recommended by athletic footwear experts to extend shoe life.
Odor Control Basics
Lingering odors in trail running shoes are often caused by bacteria thriving in moist environments. Effective drying is the first line of defense. After drying, you can further combat odors by:
- Using Drying Agents: Baking soda can be sprinkled inside dry shoes overnight to absorb residual moisture and odors. Remove it thoroughly before your next run.
- Odor-Absorbing Inserts: Specialized insoles or charcoal inserts can be left in the shoes when not in use to continuously absorb moisture and smells.
- Regular Cleaning: Periodically washing shoes (following manufacturer guidelines for cool water and gentle soap) and drying them thoroughly can help remove built-up grime and bacteria that contribute to odor. Always ensure they are completely dry before storing.
Frequently Asked Questions About Drying Trail Running Shoes
How long does it typically take to dry trail running shoes?
Drying time varies significantly. Lightly damp shoes might dry in a few hours, while moderately wet ones can take 12-24 hours. Completely soaked shoes can require 24 to 72 hours using patient, heat-free methods.
Can I use a hairdryer to speed up drying?
No, you should never use a hairdryer or any direct heat source. The heat can damage the glues and synthetic materials in your trail running shoes, leading to warping, cracking, or separation of the sole. Stick to cool, circulating air.
What's the best absorbent material to use for stuffing shoes?
Plain newspaper, paper towels, or old cotton t-shirts work well. They effectively absorb moisture from the inside of the shoe. Change the stuffing frequently as it becomes damp.
How do I prevent my shoes from smelling after getting wet?
The best way is thorough drying immediately after use. If odors persist, try using baking soda inside the dry shoes overnight or invest in odor-absorbing inserts. Regular cleaning can also help.
Is it okay to leave my shoes in direct sunlight to dry?
While sunlight can help dry things, prolonged exposure to hot direct sun can be damaging. It's similar to direct heat sources and can degrade adhesives and materials. Opt for a well-ventilated spot out of direct sun.