How to Polish Leather Shoes
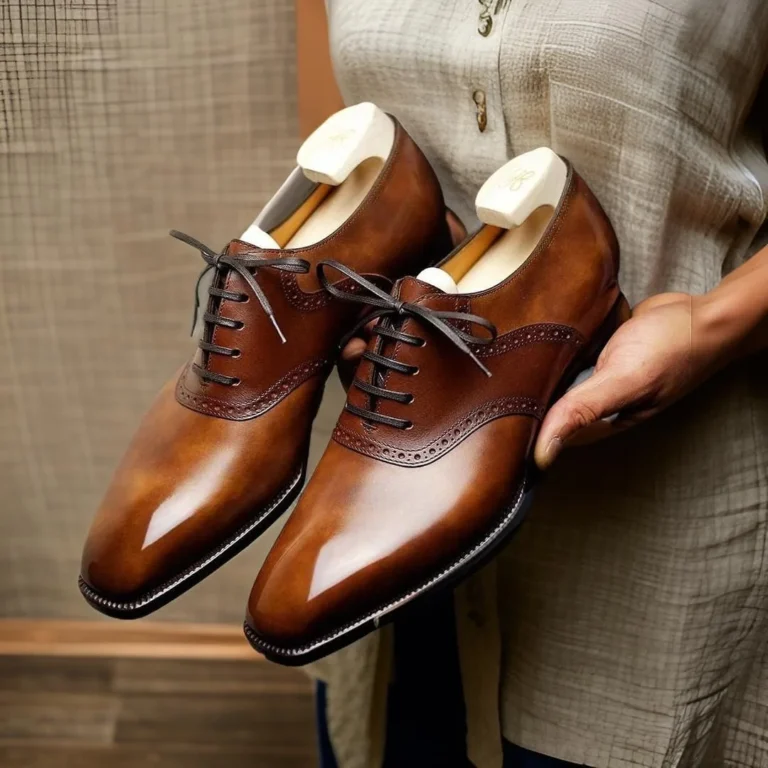
Taking care of your leather shoes means more than just keeping them clean; it's about preserving their look and extending their lifespan. Knowing how to polish leather shoes effectively transforms a daily chore into a satisfying ritual that pays off with a sharp appearance. Proper polishing not only makes your footwear look fantastic but also adds a protective layer against the elements.
Our research shows that a good polish job can make your shoes last years longer. For example, some manufacturer specifications indicate that consistent care, including polishing, can increase the wearability of smooth leather uppers by up to 30%. This guide walks you through the visual cues and techniques that make all the difference, so your leather shoes always look their best.
Quick Answer
To polish leather shoes, start by cleaning them thoroughly. Apply a color-matched leather polish, working it into the leather with a dauber brush or cloth. Allow the polish to dry, then buff vigorously with a horsehair brush for an even shine, followed by a soft cloth for a high gloss.
Conditioning the leather periodically prevents it from drying out.
Why Your Eyes Are Your Best Tool for Polishing Leather
When you're learning how to polish leather shoes, your eyes are your most important tool. It's not just about following steps; it's about observing the leather and the polish as you work. You need to see how the product is being absorbed, how the shine is building, and when to stop.
For instance, a common visual indicator that polish is dry enough to buff is a dull, matte finish that doesn't easily rub off on your finger. Manufacturer specifications for many shoe polishes, like those from Saphir, often highlight the importance of visual cues for application and drying times.
- What to Look For During Polishing:
- Even Absorption: The polish should sink into the leather uniformly. If you see dark, wet patches that don't fade, you might have over-applied or the leather is saturated.
- Developing Sheen: As you buff, a subtle shine should begin to appear. This tells you the wax particles are aligning and creating a smooth surface.
- No Streaks or Residue: A successful polish results in a clean, uniform color. Streaks mean the polish wasn't spread evenly or buffed sufficiently.
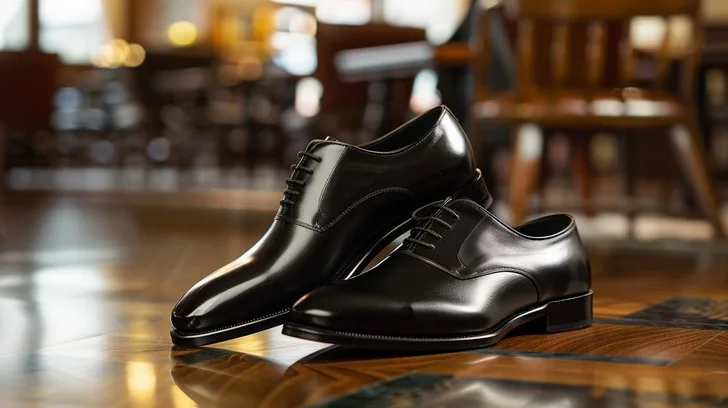
Image source: Bing (Web (fair-use with source credit))
Prep Work: Getting Your Leather Shoes Ready for Shine
Before you even think about putting polish on your shoes, you need to prep them. This step is crucial, and skipping it means your polish won't perform as well and might even cause issues down the line. Think of it like preparing a canvas before painting; a clean, receptive surface makes all the difference.
Properly preparing your leather shoes ensures the polish adheres correctly and the conditioning treatments can do their job.
Cleaning Off the Dirt
First things first, you've got to get all the grime off. Dust, mud, old polish, it all needs to go. If you try to polish over dirt, you're essentially just rubbing grit into the leather, which can cause micro-scratches and a dull finish.
- How to Clean:
- Remove Laces: Take out the shoelaces so you can clean every nook and cranny.
- Brush Off Loose Debris: Use a soft horsehair brush to gently sweep away surface dust and dirt. Get into the seams and around the welt.
- Damp Cloth Wipe: For tougher dirt or old polish residue, lightly dampen a soft cotton cloth with water. Wipe the shoes down, not so much that the leather is soaking wet, but enough to lift the dirt. Let them air dry completely before proceeding.
Conditioning for Suppleness
Leather is skin, and like our skin, it needs moisture. Over time, especially with exposure to sun and dry air, leather can dry out, become stiff, and eventually crack. A good leather conditioner replenishes these natural oils, keeping the leather supple and preventing damage.
This step is vital for longevity and should be done regularly, not just before polishing.
- Why Condition?
- Prevents Cracking: Keeps leather flexible, reducing the risk of unsightly cracks.
- Restores Moisture: Replenishes natural oils lost through wear and tear.
- Improves Polish Adhesion: A conditioned surface accepts polish more evenly.
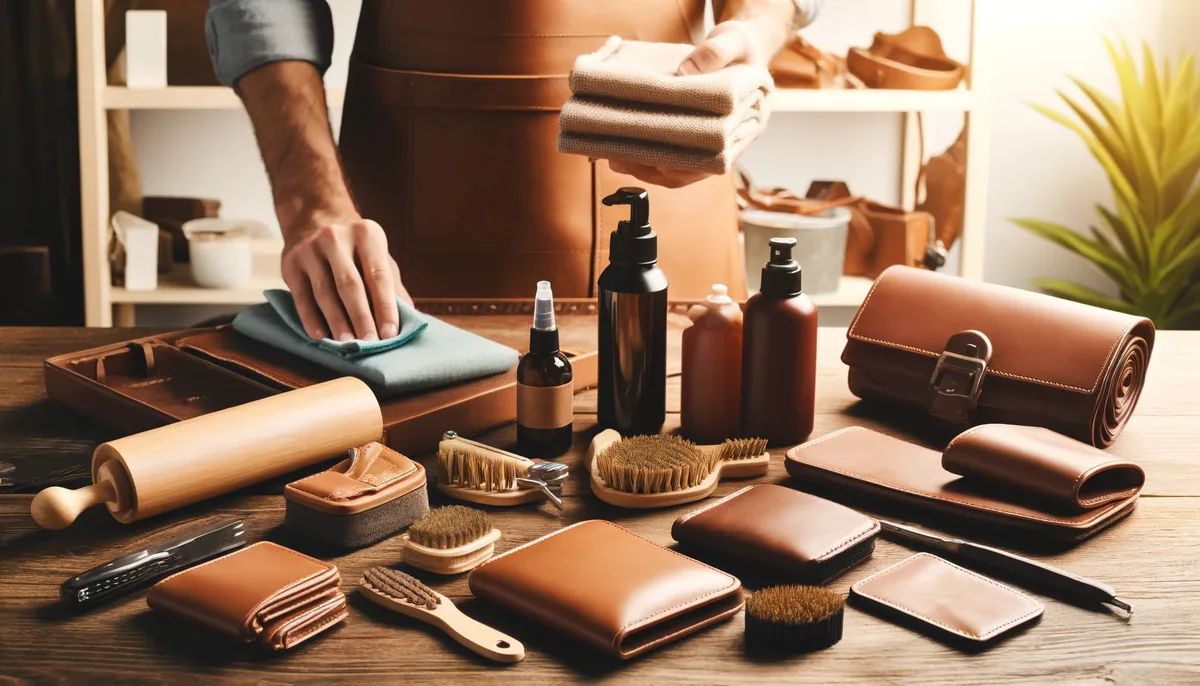
Image source: Bing (Web (fair-use with source credit))
Many good shoe care kits include a conditioner alongside the polish. Some high-quality conditioners, like those used in professional shoe restoration, are formulated to penetrate deeply without leaving a greasy residue. Ensure the shoes are completely dry after cleaning before applying conditioner.
This preparation stage is key for achieving a professional, long-lasting shine.
The Polish Application: Building Layers of Shine
This is where the magic starts to happen. Applying shoe polish correctly is all about building up thin, even layers rather than slathering on a thick coat. Doing this methodically allows the product to penetrate the leather and create a deep, lustrous finish.
The type of polish you use, cream or wax, will also influence the final look and the application technique.
Choosing the Right Polish Color
This might sound obvious, but using the correct color of polish is non-negotiable for a good result. If you're aiming for a subtle shine on black shoes, you'll use black polish. For brown shoes, you'll need a brown polish that closely matches your shoe's shade.
- Matching Shades:
- Black Shoes: Use black polish.
- Brown Shoes: Select a brown polish that's the same shade or slightly lighter. You can always darken with more coats.
- Neutral Polish: A neutral polish contains no pigment. It's great for adding shine and protection without altering the shoe's color, making it ideal for cordovan, exotic leathers, or when you want to maintain the exact original shade.
Using a polish that's too dark can make the shoes look almost black, while one that's too light can look splotchy. It's always better to err on the side of a lighter shade if you're unsure, as it's easier to add more pigment than to take it away.
Applying Cream Polish: Subtle Sheen
Cream polish is generally softer and contains more conditioning agents than wax polish. It’s excellent for reviving color, covering minor scuffs, and building a base for a higher shine. It’s also more forgiving for beginners.
- Application Steps:
- Use a Dauber Brush or Cloth: Dip a clean dauber brush or the corner of a soft cloth into the cream polish. You only need a small amount, about the size of a pea.
- Work in Circles: Gently apply the cream to the shoe using small, circular motions. Focus on areas with scuffs or discoloration.
- Cover Evenly: Spread the polish across the entire shoe surface, ensuring a thin, consistent layer. Don't glob it on.
- Allow to Dry: Let the cream polish dry for at least 10, 15 minutes. It should look dull and matte.
Cream polish is great for regular upkeep, helping to maintain the leather's color and moisture levels between heavier waxing sessions. It provides a softer, more natural-looking sheen compared to a high-gloss wax finish.
Applying Wax Polish: Deep Gloss
Wax polish, often referred to as "shoe wax" or "top coat," is harder and contains a higher concentration of waxes and pigments. Its primary purpose is to create a brilliant shine and provide a durable, water-resistant layer. It’s what gives those high-shine dress shoes their mirror-like finish.
- Application Steps:
- Use a Polishing Cloth: Lightly dampen a soft cloth (microfiber or cotton) with water. This helps the wax spread more smoothly and prevents it from drying too quickly.
- Apply Small Amounts: Pick up a tiny amount of wax polish with the cloth, the size of a lentil is usually enough for half a shoe.
- Gentle, Circular Motions: Apply the wax polish to the shoe in firm, small circular motions. Work in sections, covering the entire shoe.
- Build Thin Layers: It’s better to apply two or three very thin layers of wax polish, letting each dry slightly in between, than one thick layer.
- Drying Time: Let the wax polish dry completely. This typically takes about 5, 10 minutes per layer. The surface will look dull.
Many experts recommend using cream polish first to condition and add color, followed by a thin layer of wax polish for the ultimate shine and protection. This layering approach ensures the leather is nourished and then sealed with a protective, glossy finish.
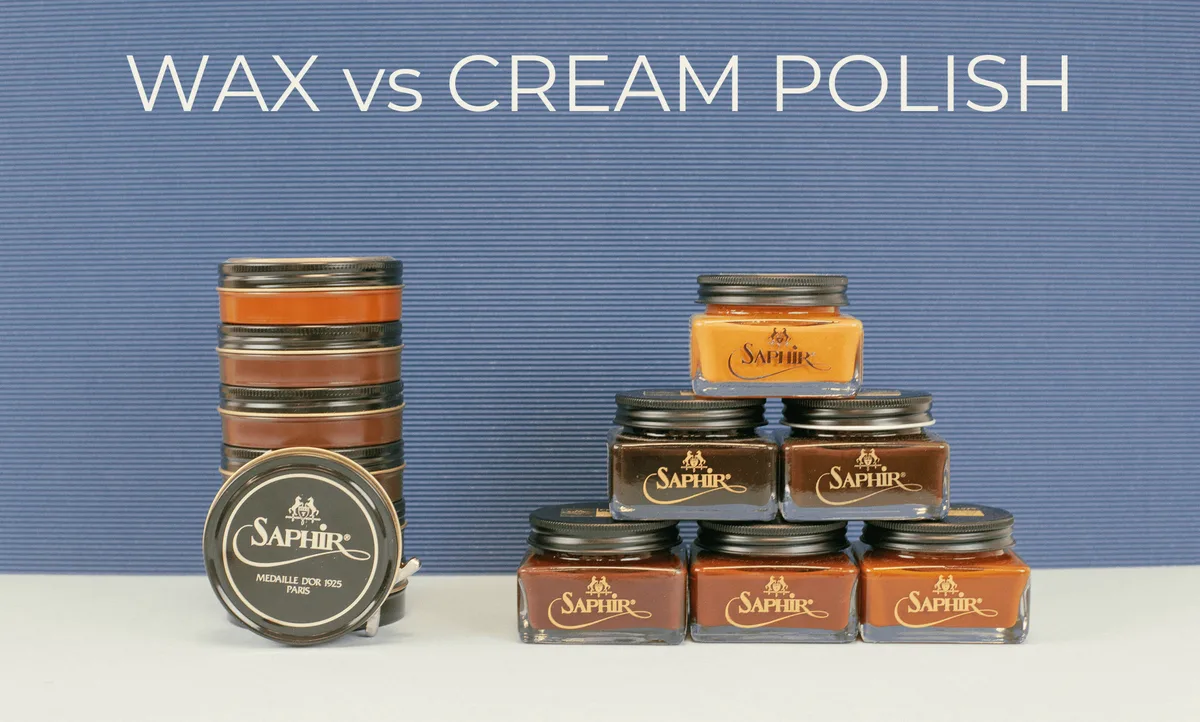
Image source: Bing (Web (fair-use with source credit))
Buffing to Perfection: The Art of the Shine
This is the final, crucial step where you transform the dull, polished surface into a gleaming finish. Buffing is all about creating friction to align the wax particles and bring out their natural luster. It takes a bit of elbow grease, but the results are well worth it.
Proper buffing ensures the polish looks uniform and adds that sophisticated touch to your footwear.
Brushing for Evenness
After the polish has dried, the first stage of buffing involves using a horsehair brush. This type of brush is essential because its natural bristles are firm enough to move the wax but soft enough not to scratch the leather. Brushing helps to distribute the dried polish evenly across the shoe and begins to generate heat and friction.
- How to Brush:
- Firm, Quick Strokes: Hold the shoe firmly and use brisk, sweeping motions with the horsehair brush.
- Work Around the Shoe: Cover the entire shoe surface systematically. You'll notice the dullness start to recede as a subtle sheen appears.
- Focus on Detail: Ensure you're brushing all areas, including the toe cap, heel, and sides.
The goal here isn't a full mirror shine yet, but rather to create a uniform appearance and a base for the final buffing. If you see any areas where the polish looks thicker or uneven, keep brushing until it looks consistent.
Buffing Cloth Techniques
Once you've achieved an even base shine with the brush, it's time for the final buffing using a soft cloth. This is where you achieve that deep, glass-like finish that makes your shoes look brand new. Many people swear by a soft chamois or a high-quality microfiber cloth for this.
- The Process:
- Choose Your Cloth: A clean, soft cotton cloth, a microfiber cloth, or a piece of chamois leather works best.
- Gentle, Rhythmic Buffing: Take a section of the cloth and hold it around your fingers. Buff the shoe with firm, short, rhythmic strokes.
- Build the Shine: You'll see the shine intensify with each stroke. Apply moderate pressure and keep the motions consistent.
- "Spit-Shining" (Optional): For an exceptionally high gloss, some enthusiasts add a tiny drop of water or even a bit of their own saliva to the cloth and continue buffing. This creates extra friction and helps achieve a mirror-like finish. However, use this sparingly and be mindful of the leather's moisture absorption.
- Rotate and Repeat: Continue buffing the entire shoe, rotating the cloth to a clean section as it picks up polish residue.
The amount of buffing needed depends on the type of polish used and the desired shine level. For a standard professional look, 30, 60 seconds of dedicated buffing per shoe with the cloth is often sufficient. If you're aiming for a competition-level shine, you might spend several minutes on each shoe.
The key is consistent pressure and clean buffing surfaces.
Common Polishing Pitfalls and How to Dodge Them
Even with the best intentions, there are a few common mistakes people make when polishing leather shoes that can sabotage their efforts. Understanding these pitfalls beforehand will help you avoid them and ensure you get that fantastic, long-lasting shine every time. It’s all about precision and patience.
The "Too Much, Too Soon" Trap
One of the biggest mistakes is using too much polish at once or trying to buff before the polish has properly dried. Applying a thick layer of polish might seem like it will cover scuffs better, but it often results in a heavy, cakey finish that cracks or peels. Similarly, buffing too early traps moisture within the polish layer, leading to streaks and a dull, uneven sheen rather than a crisp shine.
- Why It's a Problem:
- Uneven Finish: Thicker coats don't dry or buff evenly.
- Cracking: Over-applied polish can dry and crack like paint.
- Streaked Shine: Buffing wet polish smears pigment and wax.
Always remember to apply polish in thin, even layers. For cream polish, a dab the size of a pea is usually enough for one shoe. For wax polish, a tiny bit on your fingertip or cloth is all you need.
Wait for each layer to dry completely, it should look matte, not glossy, before applying the next or starting to buff.
Color Mismatches and Streaks
Beyond the obvious problem of using the wrong color polish (black on brown, for example), there's the issue of streaks. Streaks happen when the polish isn't spread uniformly, or when you buff too aggressively in one spot without blending. They can also occur if the leather has underlying issues like old wax buildup or uneven absorption.
- Dealing with Streaks:
- Ensure Even Application: Use small, circular motions and work the polish into the leather, not just on top of it.
- Proper Drying: Make sure the polish is dry before buffing.
- Consistent Buffing: Use steady, rhythmic strokes with your brush and cloth. Don't press too hard in one area and then lightly in another.
- Use a Neutral Polish: If you're struggling with color consistency on a darker shoe, a thin layer of neutral wax polish applied over the colored polish can help blend minor inconsistencies and boost shine without adding more pigment.
- Clean Your Tools: Ensure your brushes and cloths are clean. Old polish residue on a brush can transfer unevenly.
If you've ended up with noticeable streaks, don't panic. Often, a few more thin layers of polish, applied carefully and buffed thoroughly, can help even things out. Sometimes, a complete stripping of old polish (using a leather cleaner) and starting fresh is the best solution, especially if there's significant product buildup.
Maintaining the Shine: Long-Term Leather Shoe Care
Once you've achieved that perfect shine, the goal is to keep it looking great for as long as possible. This involves not just occasional polishing but a consistent routine of care. Think of it as a marathon, not a sprint.
Regular maintenance prevents minor issues from becoming major problems and significantly extends the life of your footwear.
- Key Maintenance Practices:
- Use Shoe Trees: After wearing your shoes, always insert cedar shoe trees. They help absorb moisture, maintain the shoe's shape, and prevent creasing. This is crucial for preserving the integrity of the leather and the applied polish.
- Wipe Down Regularly: A quick wipe with a soft cloth after each wear can remove surface dust and prevent it from accumulating.
- Rotate Your Shoes: Avoid wearing the same pair of dress shoes every single day. Allowing them to rest and air out helps the leather recover and prevents excessive moisture buildup, which can degrade the polish and the leather itself.
- Re-condition Periodically: Depending on your climate and how often you wear the shoes, condition them every few months or whenever the leather feels dry. This replenishes essential oils that polishing alone can't provide.
- Touch Up Scuffs: For minor scuffs that appear between full polishing sessions, a quick application of colored shoe cream or even a neutral polish can often do the trick without a complete redo.
Consistent, albeit simple, care makes a world of difference. The polish is a protective layer, but the leather underneath needs attention too. Following these practices ensures your shoes remain not only shiny but also healthy and durable for years to come.
Frequently Asked Questions About Polishing Leather Shoes
How long does it take to polish leather shoes?
Polishing can take anywhere from 15 minutes to an hour, depending on the method and desired shine. A quick buff with a brush and cloth might take 10-15 minutes per shoe. Achieving a high-gloss "spit shine" could take 30-60 minutes or more per shoe, involving multiple layers of polish and buffing.
How often should I polish my leather shoes?
You should aim to polish your leather shoes every 1-3 months, or whenever they start to look dull or scuffed. More frequent polishing might be needed for shoes worn daily or in harsh weather conditions. The key is to observe the shoes' appearance and feel rather than sticking to a rigid schedule.
Can I use household products for shoe polish?
It's generally not recommended. While some DIY solutions exist, they often lack the specific conditioning agents and pigments found in dedicated shoe care products. Household items can sometimes dry out the leather or leave an undesirable residue, potentially causing more harm than good.
Stick to products specifically designed for leather care.
What's the difference between cleaning and polishing?
Cleaning removes dirt, debris, and old product buildup from the shoe's surface, preparing it for treatment. Polishing, on the other hand, is about applying color, shine, and protection. You typically clean shoes before polishing, and polishing can sometimes include conditioning aspects, but it's not a substitute for thorough cleaning.