How to Clean Trail Running Shoes
Trail running shoes are your trusty companions on the trail, but they take a beating. When they’re caked in mud or smelling less than fresh, figuring out how to clean trail running shoes can feel like a chore. Getting it right not only keeps them looking good but also helps them last longer and perform better on your next adventure.
Our research shows that proper cleaning can significantly extend the life of your footwear. For example, the U.S. Forest Service notes that cleaning outdoor gear after use prevents damage from moisture and soil, a principle directly applicable to trail running shoes as their materials, including the durable ripstop uppers, can degrade with prolonged exposure to elements without care.
Quick Answer
To clean trail running shoes, start by removing loose debris. For light dirt, a damp cloth and mild soap work best, followed by air drying. For heavy mud, rinse thoroughly with cold water and use a soft brush with a gentle detergent before air drying away from heat.
Always avoid machine washing and harsh chemicals.
When Do Your Trail Shoes Actually Need a Deep Clean?
Sometimes, a quick wipe-down is all your trail runners need. If you've just run on dry, dusty paths and the shoes look mostly fine, you might be able to skip the full wash. This is especially true if the only "dirt" is a light dusting of soil.
However, our research indicates that even light dust can become abrasive over time, potentially wearing down the shoe’s fabric and sole if left unchecked.
Here’s a quick way to decide:
- Light Dust/Minor Smudges: A damp cloth or a quick brush might be enough.
- Visible Mud/Grime: Especially if it's caked on, a more thorough cleaning is likely needed.
- Persistent Odor: Even if they look clean, strong smells usually mean bacteria are present and require washing.
- Wet Conditions: If you ran through mud, puddles, or wet leaves, a full clean and dry cycle is crucial to prevent mold and material breakdown.
Paying attention to these cues means you’re cleaning them when they actually need it, rather than overdoing it and potentially causing wear and tear.
The Quick Clean: Wiping Away the Dust and Minor Grime
For those days when your trail running shoes have seen a bit of dust but no serious mud, a quick clean is your best bet. This method is fast, effective, and helps maintain the shoe’s materials without stressing them. It’s about surface-level tidiness.
Here’s how it typically goes:
- Remove Loose Debris: Start by tapping the soles together outside to knock off any loose dirt or small pebbles. You can also use a dry, soft brush to gently sweep away any clinging dust from the uppers and soles.
- Damp Cloth Wipe-Down: Get a clean cloth damp with cool water. You can add a tiny drop of mild dish soap or a specialized shoe cleaner if needed, but often, just water is sufficient for light dust. Wipe down the entire exterior of the shoe, paying attention to the mesh panels and any textured areas.
- Clean the Laces (Optional but Recommended): If the laces look a bit grubby, you can untie them, give them a quick wash by hand in some soapy water, rinse, and lay them flat to dry alongside the shoes.
- Air Dry: Place the shoes in a well-ventilated area away from direct sunlight or heat sources.
This approach is great for maintaining the look and feel of your shoes between more intensive cleanings.
Deep Dive: Tackling Serious Mud and Caked-On Dirt
When your trail running shoes resemble something dug out of a bog rather than sportswear, it's time for the deep clean. This process is essential to remove stubborn mud, grit, and anything else that’s stubbornly adhered to the uppers, soles, and within the nooks and crannies. Getting this right ensures your shoes don't just look clean, but are thoroughly decontaminated.
The goal here is to get rid of all foreign matter without damaging the shoe’s construction.
Initial Debris Removal: Before any water touches them, give your shoes a good whack together, sole to sole, outdoors. This dislodges the majority of the caked-on mud. A stiff brush (like a dedicated shoe brush or an old toothbrush) is your next best friend for scraping off any larger, stubborn chunks from the outsole and sides.
Soaking (Briefly): If the mud is really baked on, you might need a short soak. Fill a basin or sink with cool water. Submerge the shoes for just 10-15 minutes; prolonged soaking can weaken adhesives. The water helps to soften the mud, making it easier to remove.
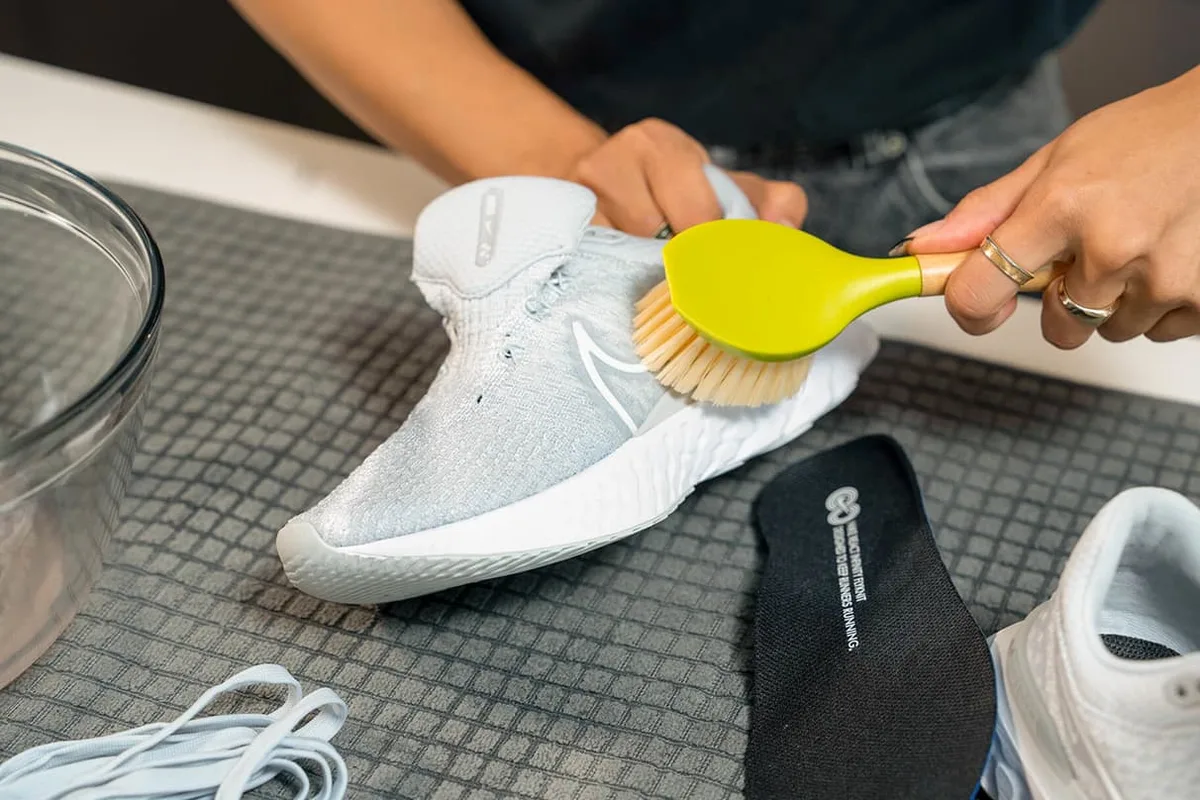
Scrubbing: Use a soft brush or a medium-stiff brush to gently scrub away the softened mud. Work in small sections, using a circular or back-and-forth motion. Pay close attention to the lugs on the outsole, the seams where the upper meets the sole, and any mesh areas where dirt can get embedded.
The Tools and Materials You'll Need
To effectively tackle that deep clean, having the right gear makes all the difference. You don't need anything too specialized, but gathering these items beforehand will streamline the process.
Here’s a quick rundown of what to have on hand:
| Tool/Material | Purpose | Notes |
|---|---|---|
| Cool Water | For rinsing and softening mud. | Never use hot water; it can damage materials. |
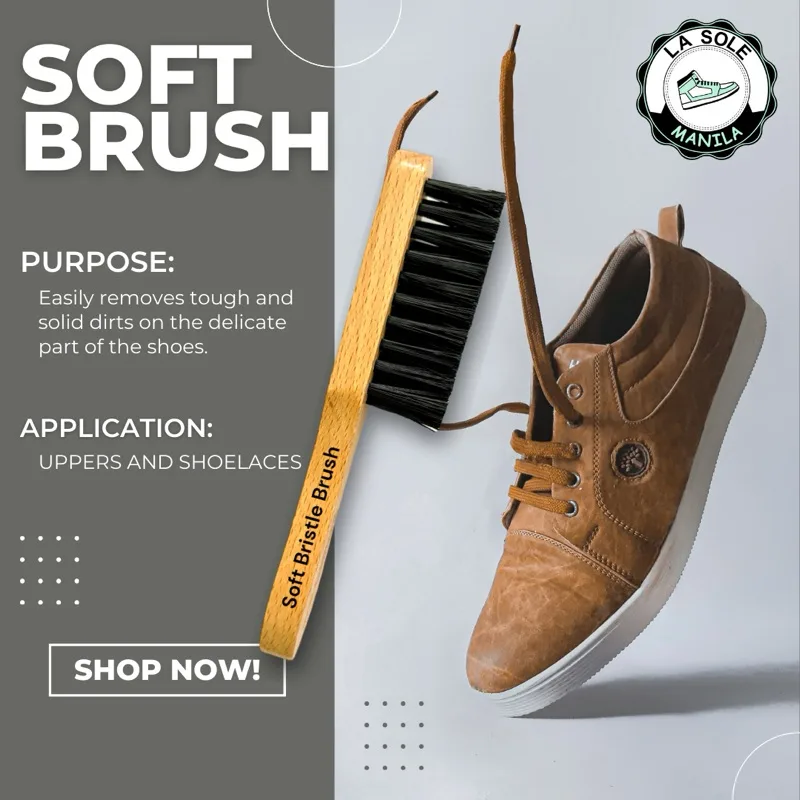
| Soft-Bristled Brush | Gentle scrubbing for uppers and mesh. | An old toothbrush works well for tight spots. |
| Stiffer Brush | For scrubbing mud off outsoles and aggressive dirt. | Avoid wire brushes, which can cause damage. |
| Mild Detergent | A gentle soap, like a pH-neutral dish soap. | Or a dedicated shoe cleaner. |
| Clean Cloths | For wiping down and absorbing excess water. | Microfiber cloths are ideal. |
| Basin or Sink | To hold water for rinsing and soaking. | Avoid using a sink you use for food prep. |
| Old Towels | For dabbing shoes dry and protecting surfaces. | |
| Newspaper or Paper Towels | To help absorb moisture from the inside during drying. | Crumple them up to create airflow. |
Having these items ready means you can move smoothly from one step to the next without interruption.
Step-by-Step: How to Deep Clean Your Trail Runners
Getting your trail running shoes properly clean involves a few key steps, designed to remove the toughest grime without damaging the shoes. Follow this workflow to bring them back to life.
Step 1: Pre-Clean and Initial Debris Removal
Before you introduce water, remove as much loose dirt and mud as possible. This prevents you from just smearing thick mud around.
- Knock Off Excess Mud: Take your shoes outdoors and firmly tap the soles together. Aim to dislodge large chunks of mud.
- Scrape Stubborn Bits: Use a stiff brush or even a dull knife edge (carefully!) to scrape off any dried-on mud from the outsole, sidewalls, and treads. Get into all those nooks and crannies.
- Brush Away Loose Dirt: Use a dry brush to sweep away any remaining loose dirt from the uppers and laces.
Step 2: The Washing Process
Now it’s time to tackle the embedded dirt and grime.
- Prepare Your Cleaning Solution: Fill a basin or sink with cool water. Add a small amount of mild detergent, about a teaspoon per liter of water is usually enough. Avoid harsh chemicals like bleach or strong solvents, as these can degrade the shoe materials.
- Gentle Scrubbing: Dip your soft-bristled brush into the soapy water. Gently scrub the entire exterior of the shoes. Work in small sections, paying attention to mesh panels, seams, and the tongue. For tougher spots on the outsole, you can use a stiffer brush, but always be gentle on the fabric parts.
- Rinse Laces Separately: If your laces are very dirty, remove them and wash them by hand in the same mild soap solution. Rinse them thoroughly.
Step 3: Rinsing Thoroughly
This is a critical step to ensure no soap residue is left behind, which can attract dirt and potentially cause material breakdown.
- Rinse Exterior: Use a hose on a low-pressure setting or a faucet to rinse the shoes thoroughly with cool water. Make sure to get all the soap suds off the uppers, midsole, and outsole.
- Rinse Inside (Carefully): You can gently rinse the inside of the shoes as well, but avoid drenching the insoles if they are removable. If you can remove the insoles, clean them separately.
Step 4: The All-Important Drying Phase
Proper drying is just as crucial as cleaning. Rushing this step or using heat can damage your shoes.
- Absorb Excess Water: Gently squeeze out as much water as you can from the shoes. Do not wring them out.
- Stuff with Absorbent Material: Crumple up old newspaper or paper towels and stuff them inside the shoes. This helps them hold their shape and absorb internal moisture. Replace the paper every few hours as it becomes damp.
- Air Dry: Place the shoes in a well-ventilated area, away from direct sunlight, radiators, or clothes dryers. Heat can warp the sole, damage adhesives, and shrink or crack synthetic materials. Allow at least 24-48 hours for them to dry completely.
If you removed the insoles, dry them separately by laying them flat in a well-ventilated spot.
Tackling Trail Shoe Odors: More Than Just a Bad Smell
Even after a good wash, trail running shoes can sometimes hold onto unpleasant odors. This is usually due to lingering bacteria that thrive in damp environments. Our research indicates that persistent smells are not only off-putting but can also be a sign of moisture that wasn't fully eliminated, potentially leading to mildew if left unaddressed.
Effectively neutralizing these odors requires more than just a surface clean.
Natural Deodorizing Methods
Fortunately, you don't need harsh chemicals to combat shoe stink. Several natural ingredients can absorb odors and leave your shoes smelling fresh.
- Baking Soda: This is a classic for a reason. Sprinkle a generous amount of baking soda inside each shoe after they are completely dry. Let it sit overnight, or even for a couple of days, to absorb moisture and odor. Then, simply tip it out and brush away any residue.
- White Vinegar: A diluted vinegar solution can kill odor-causing bacteria. Mix equal parts white vinegar and cool water. Lightly spray the inside of the shoes, or use a cloth dampened with the solution to wipe the interior. Ensure the shoes are then aired out thoroughly to let the vinegar smell dissipate. This method is best applied when shoes are already clean and drying.
- Activated Charcoal Inserts: You can buy specialized charcoal inserts designed to absorb moisture and odors from footwear. Place them inside your shoes when not in use, especially after runs, to keep them smelling fresher.
- Sunlight and Air: Sometimes, simply airing out dry shoes in direct sunlight for a few hours can help kill some bacteria and freshen them up. Be mindful not to leave them out too long, as prolonged UV exposure can potentially degrade certain materials.
When to Consider Specialized Odor Treatments
If natural methods don't quite cut it, or if the odor is particularly stubborn, you might consider commercially available shoe deodorizers. These often come in spray or powder form and are specifically formulated to eliminate bacteria and neutralize smells.
When choosing a commercial product, look for ones that are specifically designed for athletic footwear and are non-toxic. Always follow the product’s instructions carefully. Some products are meant to be sprayed in after cleaning and drying, while others might be inserts that work continuously.
It’s also worth noting that some advanced trail running shoes incorporate antimicrobial treatments in their fabrics, which can help naturally resist odor buildup.
Common Trail Shoe Cleaning Mistakes and How to Fix Them
Even with the best intentions, it’s easy to make a misstep when cleaning your trail running shoes. These mistakes can inadvertently shorten their lifespan or reduce their performance. Learning to spot and avoid them is key to keeping your footwear in top condition.
Here are some common errors and how to correct them:
Mistake: Machine Washing. Many people toss their trail shoes into a washing machine.
- Why it's a problem: The harsh agitation, high heat, and strong detergents can break down adhesives, damage delicate fabrics, and warp the shoe's structure. Manufacturers generally advise against this.
- The Fix: Always opt for manual cleaning methods as outlined above. If you must use a machine for very light cleaning and the manufacturer permits it, use a gentle cycle with cold water and no spin, placing shoes in a mesh laundry bag.
Mistake: Using Heat to Dry. Throwing shoes in a clothes dryer, placing them on a radiator, or leaving them in direct, intense sunlight to speed up drying.
- Why it's a problem: High heat is the enemy of most shoe materials. It can melt glues, crack rubber compounds, shrink synthetics, and cause the overall shoe to lose its shape and integrity.
- The Fix: Always air dry your shoes. Stuff them with paper to absorb interior moisture and place them in a cool, well-ventilated spot away from heat sources. Patience is key here.
Mistake: Using Harsh Chemicals. Employing bleach, ammonia, or strong solvents to remove stains or odors.
- Why it's a problem: These chemicals can strip color, degrade waterproof coatings (like Gore-Tex if applicable), weaken fabric fibers, and break down the adhesives holding the shoe together.
- The Fix: Stick to mild, pH-neutral detergents like a gentle dish soap or specialized shoe cleaner. For odors, use natural options like baking soda or diluted vinegar.
Mistake: Over-Soaking. Leaving shoes submerged in water for extended periods.
- Why it's a problem: While a brief soak can soften mud, prolonged immersion can weaken the glues and stitching that hold the shoe together, making them more susceptible to delamination or tearing.
- The Fix: Limit soaking to 10-15 minutes for heavily soiled shoes. Focus on scrubbing rather than prolonged submersion.
Mistake: Not Drying Thoroughly. Putting shoes away or wearing them when they are still damp inside.
- Why it's a problem: This is a breeding ground for bacteria, leading to stubborn odors and potentially mold or mildew growth. It can also cause material breakdown from the inside out.
- The Fix: Ensure shoes are completely dry, both inside and out, before storing them or going for another run. Use absorbent stuffing and allow ample drying time in a ventilated area.
Keeping Your Trail Shoes in Top Shape: Long-Term Care
Cleaning is an essential part of trail shoe maintenance, but consistent care between washes will significantly extend their lifespan and keep them performing at their best. Think of it as routine upkeep for your most important piece of outdoor gear.
Here’s how to integrate long-term care into your routine:
Immediate Post-Run Care:
- Shake Out Debris: After every run, especially on dusty or muddy trails, give your shoes a good shake outdoors to remove loose dirt and pebbles.
- Wipe Down (If Needed): For light dust or a few smudges, a quick wipe with a damp cloth is usually sufficient to prevent build-up. This can be done right after your run or before storing them.
- Dry Them Out: If your shoes got wet during the run, don't store them in a damp gym bag. Loosen the laces and open them up to allow them to air out as much as possible. Stuffing them with paper is a great habit to get into if they are significantly damp.
Regular Inspection:
- Check for Wear and Tear: Periodically examine the soles for excessive wear, especially on the lugs, which are crucial for grip on trails. Look for any signs of peeling glue, tears in the fabric, or damage to the laces. Addressing minor issues early can prevent them from becoming major problems.
- Inspect Laces: Ensure laces are not frayed or excessively worn. Replace them if they look like they might snap.
Proper Storage:
- Ventilated Area: Store your trail running shoes in a cool, dry, and well-ventilated space. Avoid sealing them in plastic bags or airtight containers, as this can trap moisture and lead to odors or mildew.
- Away from Extremes: Keep them away from direct sunlight or extreme temperatures, which can degrade the materials over time.
Mind the Terrain:
- While you can't always control the trail conditions, being aware of particularly abrasive or muddy environments can inform your cleaning frequency. Running exclusively on sharp rocks will wear down soles differently than soft, loamy trails.
By adopting these simple habits, you’re not just cleaning your shoes; you’re actively preserving their structural integrity, grip, and comfort for countless miles to come.
Trail Shoe Cleaning: Your Quick Decision Guide (FAQ)
How often should I clean my trail running shoes?
Clean them whenever they are visibly dirty or starting to smell. For light dust, a quick wipe is fine. For significant mud or odor, a deeper clean is necessary.
It's best to clean them after particularly muddy or wet runs to prevent damage and odor buildup.
Can I use a pressure washer to clean my trail running shoes?
No, absolutely not. High-pressure water can force debris deeper into the shoe’s materials, damage adhesives, and even tear fabrics. Always use low-pressure water or a damp cloth for cleaning.
What’s the best way to dry my trail running shoes?
Always air dry them. Stuff them with newspaper or paper towels to absorb internal moisture and place them in a well-ventilated area away from direct heat or sunlight. This typically takes 24 to 48 hours.
Never use a machine dryer or direct heat sources.
My trail running shoes still smell after washing. What should I do?
Ensure they are completely dry first. If the odor persists, try natural deodorizing methods like filling them with baking soda overnight or wiping the inside with a diluted white vinegar solution (equal parts vinegar and water), then letting them air dry again. You can also use specialized shoe deodorizers.
Is it okay to clean the insoles separately?
Yes, if your insoles are removable, cleaning them separately is often beneficial. You can hand wash them with mild soap and water, rinse them thoroughly, and air dry them completely before reinserting them into the shoes. This helps tackle odors originating from the footbed.






One Comment